Leaderboard
Popular Content
Showing content with the highest reputation on 03/30/2015 in all areas
-
Regarding image sizes, same camera, same session ..... "Some" cameras will change the image size (actually the pixel count) automatically if there's too little light, or a close focus option is used. (Often a 'close focus' setting reduces the amount of light getting to the sensor, so it is then treated as a low-light image.) For the shoes .... Since they have been made for your feet, I might rightly assume they fit very well. As for the style, I would consider it 'optimum', if not perfect. I LOVE a pointed toe, always have done, no-matter men/womens style, 'pointed' does it for me. Possibly going back to imprinting, from my formative years? I suppose we'd all prefer a thin heel, but experience suggests they don't last long used in the big outside world, (pavement damage) and wear quickly. They are more noticeable when 'caught' sight of by others (they stand out as anomalous if spotted), so a block/cuban style heel is more practical and less obvious. I have thinner heeled shoe boots I like to wear, but my 'go to' footwear has thicker/safer, less prone to wear and damage heels. Just like these. Very good choice.1 point
-
Well done sir! The first picture is perfect and large enough to see detail. The second picture is a tad small at 24k. (Small even for my clock-work phone. ) There are circumstances where you can make a picture 'grow', but in reality you would just be stretching the same amount of detail over a larger surface. Not really worthwhile, unless printing to a hardcopy. Ordinarily/usually, you start off with a picture that's as large as you ever might want it, and then reduce it down to the size you want to present it. Fortunately, small-ish images, look reasonably big 'on screen'. There are pictures in my Albums from the time when the only images I presented were from my clockwork phone. The quality (pixel count, contrast/colour saturation) is crepe, but you get the flavour of the image which I considered more important than no pictures at top quality. Even the most basic camera phone will have a 2 mb camera which might produce an image too large to post here. The usual problem then, is reducing the image size. Worst case, you can show the image on your computer screen and use the Windows "Snipping Tool", found in the Accessories. [start - All Programs - Accessories - Snipping tool.] This assumes you (or anyone) has a hardwire/Bluetooth connection to their phone for viewing images, or media you (or anyone) can use as removable storage (USB/SD card) from a camera or other 'donor'. This will allow you to create [File - Save- Select .jpg from the filename extension options - Filename.jpg] an edited screenshot. These are small in size, but usually provide enough detail to illustrate whatever you (or anyone) is trying to show. Most of my pictures showing shoe brand styles, use a similar method by taking a screen shot. You can do a similar thing with "PrtScrn" and Paint, but it's a little more involved. Once you've done any of this once or twice, it'll become second nature. While experimenting, you may even find better/faster methods that'll let you show the rest of us how to do it more easily. I know that hh4evr1 has trouble posting images here, because of the file size. (Too big.) No excuse now though.....1 point
-
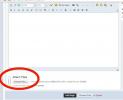
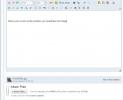
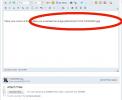
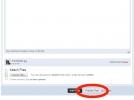
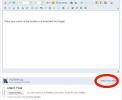
You have that absolutely right as I don't browse mens shoes. I have two pairs of (mens) shoes that were originally quite expensive (to me) that came from M+S that I had stumbled across during sales periods, could be respectively 3 and 5 years ago. Never been on my feet. In fact one pair has never been out of the M+S bag I was given to get them home in. The other pair are covered in brick dust because I hadn't realised just how far the dust could travel. (10ft to the other end of the room was easy- seemingly.) I was never going to remember the name, and to be honest I thought it might be the Canadian fella (who's name I can't remember either). I read recently on a Facebook page, "It's great being 50, I learn something new everyday. And forget 5 others." That would be me too. To add a picture ..... (which I'm sure is an egg-sucking exercise really) .... You will first need to know the location of the picture you want to include. Windows typically wants you to keep your pictures in a location that's tied to your computer log-on user name (account name), like this: c:\documents and settings\username\my pictures\picture.jpg Where "c:" is the first (physical or logical) hard drive on your computer. Often a 'data' drive (one that doesn't get over-written with an OS install) will be a d: drive or e: drive. "documents and settings" is the generic data area on a windows computer. "username" will be the log-on name if you have more than one account (Mrs Puffer might be another account). "My Pictures" is one of the default Windows sub-directories. My Music, My Video's are also Windows defaults. "picture.jpg" would be the picture you want to upload. If you are loading from a USB stick, always a sensible place to keep personal photo's, the 'target' for the upload might simply be; e:\picture.jpg or, f:\picture.jpg largely dependant on what drive letter your OS had assigned to the USB stick when you plugged it in. There is also a file size limitation of 512k, which is quite small really. I tend to use a cheap/free picture editor for cropping and sizing before inclusion here. The hard part, is getting it on here - possibly..... When you use the 'quick' editor on here, the option to include picture isn't visible. You have to select "More Reply Options". With the new options visible, select "Attach files" This is where knowing the location of the file you want to upload, is important. I can't show it here as my hard drive/directory structure will be unique to my computer. At this point you are offered the opportunity to 'Browse' your computer file system for the image(s) you want to include. When the file is uploaded (should be quick), place your cursor where you want the picture to appear Your screen should look something like this: While the photo has been uploaded (stored by H4M) it hasn't been included into the post, so you have to "add" it to the post. Initially, it will just look like you've added a file name. Use the preview option to see if it has worked as you expected. And review. If all is good, carry on as normal. If the newly added picture is in the wrong place, delete the file reference in the post, re-position the cursor, and then "Add" the picture again in the right place (hopefully). If you have added the wrong picture (the one with the naked girl in heels) delete the file reference in the post as before, and use the "Delete" option which is right next to the "Add" option, to completely remove the file (picture) from being stored too. As you will know, you can only edit posts for 24 hours. That means any included pictures are here forever, after the 24 hour editing period concludes. Hopefully, I haven't missed anything out. Been 15/18 years since I've written a proper manual.1 point


